Try these 10 yoga poses to keep diabetes under control!
Astrologer-Yoga trainer-Vasthu specialist-Puja and Prayer services
Astrologer K.V.Vighnesh
ph: +91 9445548316 //+1(425) 358-6565 wat'sapp
www.astrovighnesh.com // www.astrovighnesh.in
With the rising number of people being diagnosed with diabetes, it is no wonder scientists are looking for newer methods to treat the disease. One of the cornerstones of controlling one’s blood sugar is regular and holistic exercise. And yoga is one such ancient measure to effectively control your blood sugar levels. But before we discuss in detail about various yoga poses to keep diabetes under control, here’s what you should know about the significance of exercise for diabetics.
Exercise — the key to stay healthy
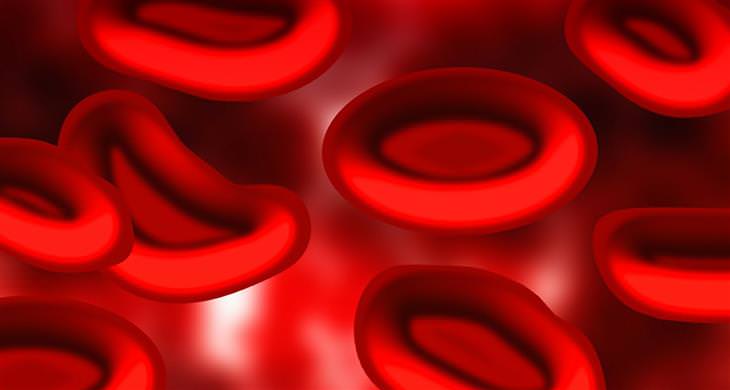
Diabetes is caused when your blood cells do not respond to insulin produced in the body. When you follow a regular exercise regimen, your body starts responding to insulin, helping to reduce your blood glucose. Exercise also helps improve blood circulation in your body, particularly in the arms and legs, where diabetic patients most commonly encounter problems. It is an excellent way to fight stress, both at the body and mind level, which in turn helps keep one’s glucose levels down. Here are top 8 reasons why you should start exercising today.
How yoga helps to fight diabetes
Regular yoga practice can help reduce the level of sugar in the blood, along with lowering blood pressure, keeping your weight in check, reducing the severity of the symptoms and slowing the rate of progression of the disease. It also lessens the possibility of further complications.
Stress is one of the major reasons for diabetes. It increases the secretion of glucagon (a hormone responsible for increasing blood glucose levels) in the body. The consistent practice of yoga aasanas, pranayam and a few minutes of meditation can help reduce stress in the mind and protect the body from its adverse effects. This, in turn, reducing the amount of glucagon and improve the action of insulin.
The practice of yoga is also a proven to lose weight and slow the process of fat accumulation. Surya namaskar and kapal bhati pranayama are some of the most effective yoga poses that aid weight loss. Since obesity is a major contributing factor for diabetes, doing yoga to keep your weight in check is the key. Here’s how to practise Surya Namaskar the right way.

#1 Pranayam
Breathing in deeply and breathing out helps oxygenate your blood, and improves circulation. It also calms the mind and gives your rattled nerves some much needed rest. Here are few more health benefits of pranayama you should be aware of.
Steps to do this pose:
· Sit on a yoga mat on the floor. Fold your legs in either padmasana or sit cross legged.
· Now straighten your back, keep your chin parallel to the floor, place your hands on your knees with your palms facing upwards and close your eyes.
· Breath in deep and hold your breath for five counts. Exhale slowly. Repeat this process at least ten times.
· Once you are done, rub your palms together till they are warm, and place them on your eyes. Now slowly open them and smile.
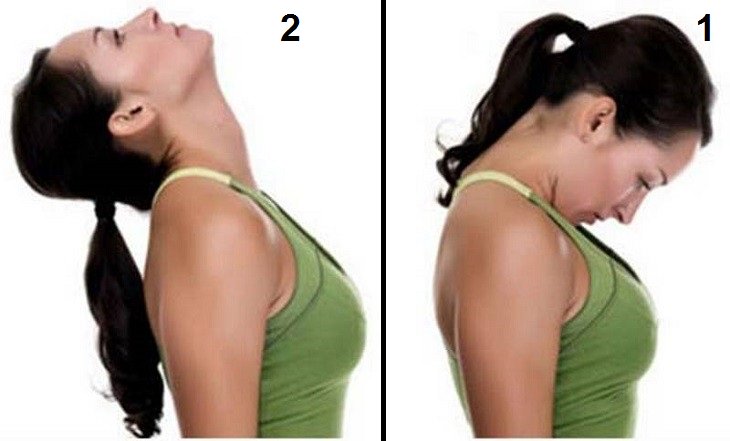
#2 Setubandhasana
This pose not only helps keep one’s blood pressure in control it also helps to relax the mind, improves digestion, relieves the symptoms of menopause in women and stretches the neck and spine.
Steps to do this pose:
· Lie flat on your yoga mat, with your feet flat on the floor.
· Now exhale and push up, and off the floor with your feet.
· Raise your body up such that your neck and head are flat on the mat and the rest of your body is in the air.
· You can use your hands to push down for added support.
· If you are flexible you can even clasp your fingers just below your raised back for that added stretch.
· The key here is to not overexert or hurt yourself while doing this pose.
Tip: Avoid doing this pose if you have a neck or back injury.
#3 Balasana
Known quite aptly as the child’s pose this is a great stress buster. It gently stretches the hips, thighs and ankles, calms the mind and helps relieve stress and fatigue. It is also a great remedy for that lower back pain you might have from long hours of sitting.
Steps to do the pose:
· Sit on the floor with your weight on your knees. Now flatten your feet onto the floor and sit on your heels.
· Spread your thighs apart a little. Exhale and bend forward from your waist.
· Let your stomach rest on your thighs and extend your back. Now stretch out your arms in front of you to elongate the back.
· You can also rest your forehead on the floor. This may require flexibility, so don’t push your body beyond its limit. You will get better with time.
· This is a resting pose so you should ideally breath at a normal pace. You can stay in this pose for as long as three minutes or as little as five counts
Tip: If you are pregnant, have a knee injury or have diarrhoea do not do this pose.

#4 Vajrasana
This is a simple pose that is great to relax the mind, improve digestion and massages thekanda. According to Ayurvedic principles, kanda is a spot about 12 inches above the anus that is the point of convergence for over 72,000 nerves.
Steps to do this pose:
· All you need to do is place a yoga mat on the floor.
· Kneel on the mat, and let the top surface of your feet touch the mat, such that your heels are pointing upwards.
· Now gently place your buttocks on your heels. It is important to note that your heels are on either side of your anus.
· Now place both your palms on your knees, facing downwards. Close your eye and breath in deeply at a steady rate.

#5 Sarvangasana
This pose is essentially known for its ability to regulate the working of the thyroid glands. These glands are responsible for the proper functioning of the entire body including the digestive, nervous, reproductive system, regulating metabolism and respiratory system. Apart from that, it nourishes the spine with a good supply of blood and oxygen, helping you beat nervous system disorders, and improving your all round health. Read more about how sarvangasana works
Steps to do this pose:
· Lie on a yoga mat with your legs extending outwards.
· Now slowly raise your legs either by first folding them at the knees or by lifting them straight.
· Place your palms along your back and hips to support it, and raise your body while pointing your toes to the ceiling.
· All your weight should be on your shoulders. Make sure you breathe slowly and lock your chin into your chest.
· Your elbows should be touching the floor and your back should be supported. Hold this pose for as long as you are comfortable.
· To return to the lying position, slowly lower your body. Do not fall back to the lying position.
Tips: Do not do this pose if you suffer from any neck or spinal injuries. If you do have high blood pressure perform this exercise only under supervision.

#6 Halasana
This pose is great for those who sit for long hours and tend to have bad posture. It stimulates the thyroid glands, parathyroid glands, lungs and abdominal organs, therefore helping the blood rush to your head and face, improves digestion and keeps the hormonal levels in check. Read more about how halasana can beat bad posture and backache.
Step to do this pose:
· Lie flat on the floor with your feet flat stretched out. Place your arms by your side and bend your knees so that your feet are flat on the floor.
· Now, slowly raise your legs from the hips. Place your hands on your hips as you raise them and use your hands as support.
· Now slowly bend your legs at the hips and try to touch the floor behind your head with your toes and straighten your hands so they are flat on the floor.
· Breath out while going up. To return to the lying position gently roll your back onto the floor, breath in while you come down. Do not drop down suddenly.
Tip to keep in mind: If you suffer from liver or spleen disorders, hypertension, have diarrhoea are menstruating or have suffered a neck injury, avoid doing this pose.

#7 Dhanurasana
This pose is great to strengthen your back and spine, stimulate the reproductive organs, beats stress and fatigue, relieves menstrual pain and constipation.
Steps to do this pose:
· Lie on your stomach with your feet hip-width apart and your arms by the side of your body.
· Fold your knees and hold your ankles. Breathing in, lift your chest off the ground and pull your legs up and back.
· Look straight ahead with a smile on your face. Keep the pose stable while paying attention to your breath.
· Continue to take long deep breaths as you relax in this pose. But don’t get carried away!
· Do not overdo the stretch. After 15 -20 seconds, as you exhale, gently bring your legs and chest to the ground. Release the ankles and relax.
Tip: Do not practice this pose if you have high or low blood pressure, hernia, neck injury, pain in the lower back, headache, migraine or a recent abdominal surgery or if you are pregnant.

#8 Chakrasana
This pose is great to stretch the spine and relax the muscles of the back. Moreover it helps relax the mind and make it stress free.
Steps to do this pose:
· To do this pose start by lying on your back with your arms horizontally stretched out in line you’re your shoulders.
· Bend your knees and bring your feet close to your hips. The soles of your feet should be fully on the ground.
· Swing your knees to the left until the left knee touches the ground (the right knee and thigh should rest on the left knee and thigh).
· Simultaneously, turn your head to the right and look at your right palm. Make sure your shoulder blades touch the ground.
· While the body is twisted, there is a tendency for one of your shoulder blades to lift off the ground. You must work against this tendency for the stretch to be effective.
· Feel the stretch in the thighs, groin, arms, neck, stomach and back as you hold the pose. With each exhalation, relax deeper into the pose.
· After a few minutes, you may slowly turn your head back to the centre, and straighten the torso and legs. Mirror the pose on the other side.
Tip: Avoid this posture if you have any spinal injuries.

#9 Paschimotasana
This is a forward bending pose that helps the blood to flow to the face. Apart from that, it helps the stomach function better, strengthens the thigh muscles and relaxes the back and arms.
Steps to do this pose:
· Sit with your legs stretched out on the floor. Next hold the big toe of your feet with your index finger and thumb.
· Now, exhale and slowly bend forward and try to touch your forehead to your knees.
· The key is that your elbows should touch the floor.Do not breath in.
· Stay in this position for five counts and inhale as you rise back to the sitting position.
Tips to keep in mind: If you have any type of back pain or complaints with your spine, do not do this pose. Moreover, be easy on yourself, you might not be able to touch your knees with your forehead. Know that if you keep at it you will regain your flexibility and be able to do the pose properly.

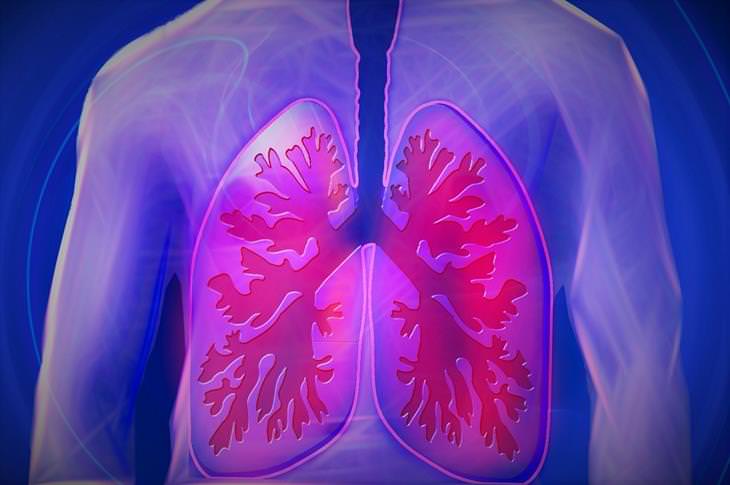
#10 Ardha Matsyendrasana: This asana is specifically designed to increase the capacity of your lungs so it can inhale and hold more oxygen. It also loosens up the spine and relieves backaches and discomfort in the back.
Steps to do this pose:
· Sit up with your legs stretched out straight in front of you, keeping your feet together and your spine erect.
· Bend your left leg and place the heal of your left foot beside your right hip (optionally, you can keep your left leg straight).
· Now, Take the right leg over your left knee and place your left hand on your right knee and your right hand behind you.
· Twist at the waist, shoulders and neck in this sequence to the right and look over the right shoulder. Hold and continue with gentle long breaths in and out.
· To come back to the starting position, continue breathing out, release the right hand first (the hand behind you), release the waist, then chest,lastly the neck and sit up relaxed yet straight.
· Repeat to the other side. Breathing out, come back to the front and relax.
Tip: If you have a back injury, do this pose only in the presence of a certified trainer.
Apart from this, a few minutes of regular meditation practice also acts as an excellent stress-buster for the mind and body. Interestingly, while stress is the major cause of diabetes, the condition in turn results in patients getting highly stressed about it, which further aggravates the problem. It has also been observed that most diabetics lose self-confidence and end up brooding over their condition. This is where meditation can help – restoring their confidence levels so that they gain the strength to fight the condition and live well. Craving for sweets is a common occurrence in diabetes. Regular practice of meditation can help drop such cravings to a large extent. If you’re a beginner, refer to this 10 step
meditation
guide.